Verify Google Search Console

How to Verify Google Search Console

How to Verify Google Search Console

Google Analytics provides amazing data, but combine that with Google Search Console data and you really boost your SEO and traffic insight.  Follow this quick guide below to verify Google Search Console so that you can begin using this amazing data.


1 – To verify Google Search console, you first need to login to Google Search Console.


2 – Click on the red “Add a property” button in the upper right hand corner of the screen.


Add A Property


3 – An “Add a property” pop-up box appears.  Type or paste in the full URL of your website.  Be sure to include HTTP or HTTPS.

Enter Property Name


4 – Verify ownership.  In this case, it’s recommending that I verify with Google Analytics which is great since I have that set up.  Click the “Verify” button.  Of course, you can verify your site with alternate methods, but using Google Analytics seems to be the easiest.

Verify Ownership of Property


Screenshot of alternate verification method below.

Alternate Methods to Verify Property


You’re all set! After you click “Verify,” you should the see success message below.  Google Search console will begin analyzing site and Google states that it may take 24 hours before you begin to see data.


Google Search Console Success


How to Connect SeoHighLighter to Google Analytics

How to Connect SeoHighLighter to Google Analytics

How to Connect SeoHighLighter to Google Analytics

You’ve signed up and now you’re anxious to monitor and understand your website traffic.  Follow the simple steps below to hookup your website.  Remember, you can add as many sites as you wish!

1)      Log in to your SeoHighLighter.com account and navigate to the Dashboard page.


2)      On the Dashboard page, you will see the “Begin Setup” button in the middle of the page.  Click on that.


3)      When you click on the “Begin Setup” button, you will be redirected to Google to authorize the connection between SeoHighLighter and Google Analytics.  I find it easier if I am already logged in to the Google Analytics account that I would like to connect.


Choose A Google Analytics Account


4)      Once you have selected your Google account, we ask for your permission to connect SeoHighLighter to your Google Analytics and Google Search Console data.

Allow Access to Google Analytics


5)      Click allow and you will be redirected back to Website set up page at SeoHighLighter.  The default website category is “My Sites.”  You can modify that later if you wish.  Under “Website Name” type in a name that best describes your website.  Under “Choose Analytics Profile,” there is a drop down menu where you can select the site that you’d like to connect.  Click “Save” and you’re all set.


6)      Repeat this process to add as many accounts as you’d like.  If you have your Google Search Console account connected to your Analytics property, you’ll be able to use all features available in SeoHighLighter.com.  Thank you for signing up!

Install Google Analytics Tracking Code

How to Install Google Analytics Tracking Code

How to Install Google Analytics Tracking Code

The only way to fully understand your site’s performance is with Google Analytics. To install Google Analytics tracking code, read this short guide to get started.

For beginners to Google Analytics, it might seem like a daunting challenge to get the infrastructure set-up. But with a little direction, it can be done.  And before too long you will be receiving valuable traffic and performance reports for all the pages on your site.

What is the Google Analytics ID Tracking Code?

Google Analytics does offer some information about the ID Tracking Code. However, the instructions are quite technical and hard to interpret for a new user. But don’t sweat it – we have you covered!

1.     Setting Up a User-ID

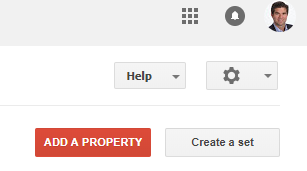
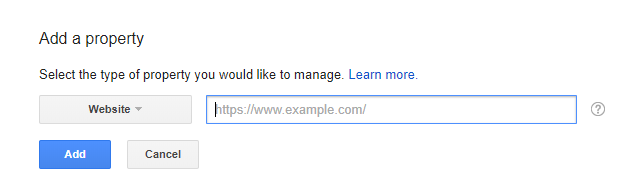
Setting up your tracking code is the first thing to do after signing up. In the Admin section of your Analytics homepage, you should see your account name linked to a site property.

Below the site property, notice the ‘Tracking Info’ headline. Click on it and select the ‘Tracking Code’ topic below the Tracking Info header. This is where your Tracking ID will be posted, in both an ID and HTML code form.

2.     Paste Tracking Code to All Pages

Simply copy and paste this code onto the various pages of your site. In most cases it is placed above all the text in the <head> section of the site. If you are operating an e-commerce site via Shopify, they will provide clear instructions for where to apply a tracking code for the whole site.

If you are using WordPress, it is even easier!  I recommend installing the Sumo or Google Analytics Dashboard for WP plugins.  With these plugins, you simply copy and paste your tracking ID to the settings section of the plugin or authorize the plugin to use data from your Google Analytics account.  No coding required.

Google Analytics for WordPress Plugin


3.     Session Unification Is Helpful

Session unification is important because it ensures that when the same person searches for your site from two different platforms, Your Google Analytics software is able to associate them as coming from the same person, rather than two different people.

It is part of a larger User ID tracking system designed to streamline your customer insights, and as such makes for an important addition. To set it up, simply go to the Admin section of your Analytics account, click on User ID, and then select ‘Step 2’. You will see a toggle switch currently in the OFF position. Switch it to ON, and congratulations, you have just initiated session unification.

4.     Verify that the Google Analytics Tracking Works

Once you have set everything up on the back end of your site, it’s time to verify that data is actually coming in! It takes approximately 24 hours for the first session views to be reported, and there are a couple of ways to ensure it’s all working for you.

  • Check the “Status” message on the page you applied the ID code to. If it states “Receiving traffic” then everything is as it should be.
  • Observe the number of people using your site right now in the Real-Time data section. To see if tracking works, simply browse through some pages of your site and see if they appear in the Real-Time data section.

Start Slow and Build Up a Solid Base

I hope this guide is useful to you when you install Google Analytics tracking code for your website. While it might take a few months to gather solid data on your site, by installing Google Analytics tracking, you are making it possible to optimize areas of your site you never thought possible.

Google Analytics Weekly Email Summary

Google Analytics Weekly Email Summary

New Feature:  Google Analytics Weekly Email Summary

We just a released a new feature that will make it easier than ever to monitor your website traffic -> a Google Analytics Weekly Email Summary.  Whether you are in our free or paid plan, you will receive a weekly email summary of your Google Analytics traffic.

You can expect email like the sample email below.  Of course Site 1, Site 2 and so on will be replaced by the name of your website.  Make sure you select your timezone in your settings page so that we can deliver your email at the correct time.

Every Monday morning, you can expect an email delivered to your inbox with important website traffic data.  The weekly email summary covers the time period from Monday to Sunday of the prior week.

Of course, you can unsubscribe at any time in your settings page, but we know that you’ll find these Google Analytics summaries very valuable.  In a future release, we plan to show the percentage changes over the previous week.

Sample Email

Hello Ben,

Here’s your summary of activity from last week.

* Site 1 had 1,378 sessions, 2,202 page views, 1,125 users, 1.6 pages/session, 90.09 seconds average session duration and 77.21% bounce rate.

* Site 2 had 1 sessions, 2 page views, 1 users, 2 pages/session, 1 seconds average session duration and 0% bounce rate.

* Site 3 had 27 sessions, 105 page views, 18 users, 3.89 pages/session, 371.41 seconds average session duration and 55.56% bounce rate.

* Site 4 had 16 sessions, 20 page views, 16 users, 1.25 pages/session, 10.31 seconds average session duration and 87.5% bounce rate.

For more analytic details, please visit: https://www.seohighlighter.com/customer

Have a great week!
SeoHighLighter.com Team

To unsubscribe from these emails please follow this link https://www.seohighlighter.com/customer/user/settings.